
I’ve been trying to get a CAD solution that doesn’t require me to be sitting at the computer in the shop, which for me means it has to run on Mac. I tried out LibreCAD, and I’m starting to get the hang of it, but I still ended up rebuilding a majority of each part in CamBam.
I had 3 parts I wanted to build for my telescope, and what with one thing and another, I ended up finishing two of them.
The first part was built mostly from the DXF I got from LibreCAD, a bunch of circles and rectangles. I did have to maneuver the bits around a lot, but that was expected.
I’m still figuring out how to lay out parts on the material — I find large enough spots manually, and re-zero the machine in between each cut. I think this is called a “fixture” and is completely normal, but I’m a bit new at it.
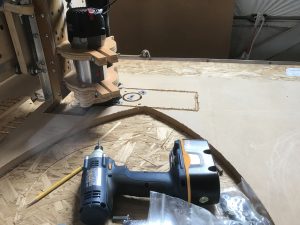
I hate when I’m off by a little and leave a divot in the side of my part…
I could also use a better indicator of where the zero point is; I tried various things today, but either a laser crosshair or a camera, or at least a light… there is a lot of hit-or-miss work to laying the parts on the board.
The second part I ended up rebuilding from scratch in CamBam; I just couldn’t get all the angles set up properly in the LibreCAD.
The slots are to hold the jig beds — thinking in 3D bends my brain a bit.
LibreCAD has a bunch of “line orthogonal to target line” and “line parallel to target line” tools that make this kind of build easy to lay out, but I am still learning how to set lines at particular angles.
I had to to a bunch of mental gymnastics to get this to work in CamBam, but once I figured out the Transformation Matrix, things started coming together pretty quickly.
I will someday learn how to do holding tabs, but for now I put hold-down screws in everywhere.
I also went back to putting in an “outline” MOP at the beginning of each cut, so I can see where the pieces are going to be (helps me make sure that the screws are out of the way).
Oh! And I figured out how to get CamBam to insert a machine pause after the drills! I have a chunk of G-Code that I stick into the CustomMOPFooter of the Drills MOP, and that does it. I’m sure that there’s a way to make a “style” to handle it, but I didn’t bother to figure that out.
I updated the “default” style in CamBam to use 15000 spindle speed, and -1 default depth (because -0.75 wasn’t cutting all the way through).
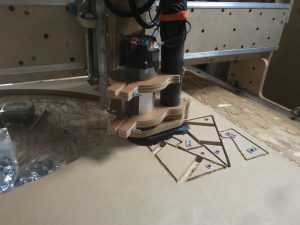
I think that hold-down screws are my favorite part, although I really like those pocket cuts…
The Z axis nut is really a problem; I need to fix it first thing. I can see that the bit isn’t plunging all the way in, because the Z nut moves up and down by about 1/2″, yuck. I have a couple ideas for metal L-brackets, I just need to carefully measure things and get one installed.

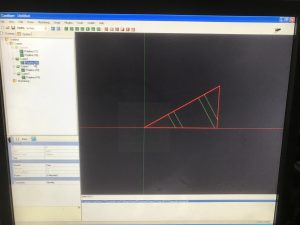
I like the way a complicated cut looks on the monitor.
With the exception of one drawing that had an error in it (I had a piece rotated 90º in the finished part), everything went off without a hitch today.
The inaccuracy in the Z nut is the biggest problem with the machine right now. I have a feeling once I get that squared away, my cuts will be a lot more repeatable.
One way or another, though, I really feel like I’m able to treat the CNC as a “tool” and not so much a “project” now. If I could get my CAD workflow a little smoother, I’d be able to start producing parts at a steady rate.