
I decided that I absolutely wasn’t going to cut anything else on the big CNC before fixing the Z nut. The hack I made to get it installed in the first place has never worked properly, but it was really starting to look worrisomely close to failure.
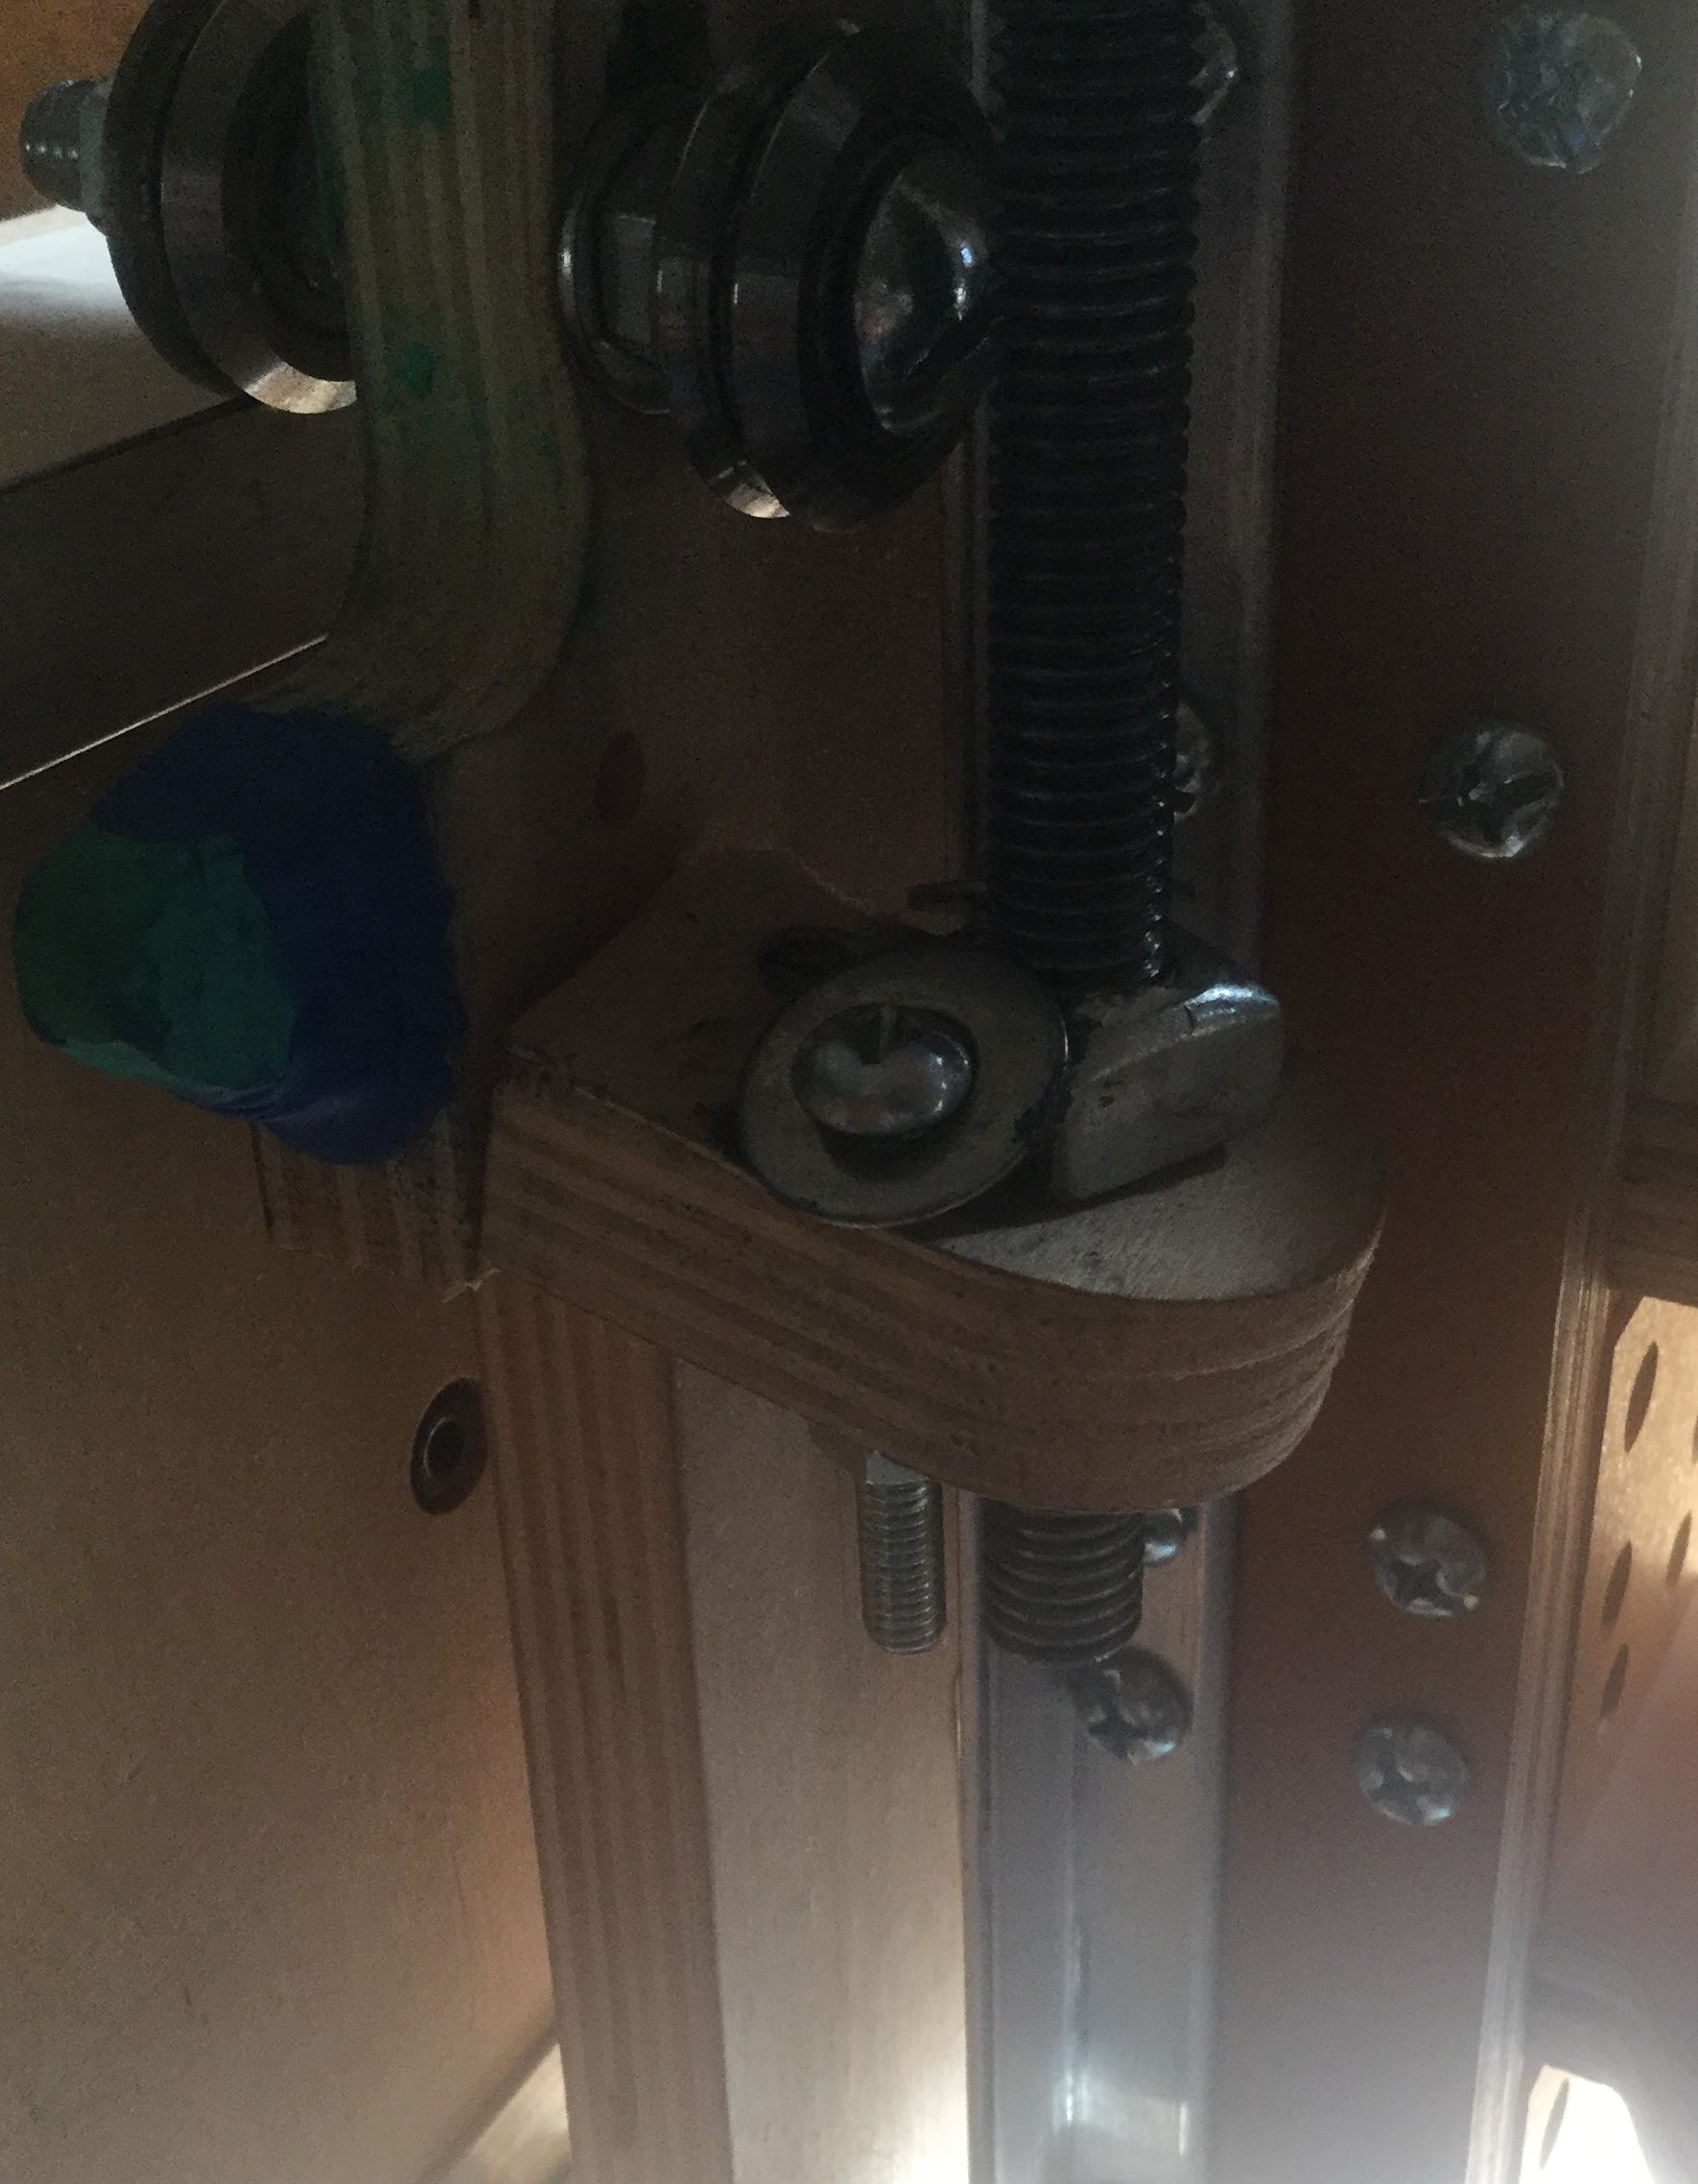
Why, no… it’s *not* supposed to be angled down 30 degrees… why do you ask?
For some reason, I was really stressed out about how to complete the fix for this. It seemed obvious to me that plywood was not going to be the answer. I mean, I know the original design called for ply, but I couldn’t figure out how to make it strong enough to work.
3/4″ plywood is strong, but I was asking it to hold in a direction it’s not strong in, and didn’t give it a whole lot of meat to hold onto.
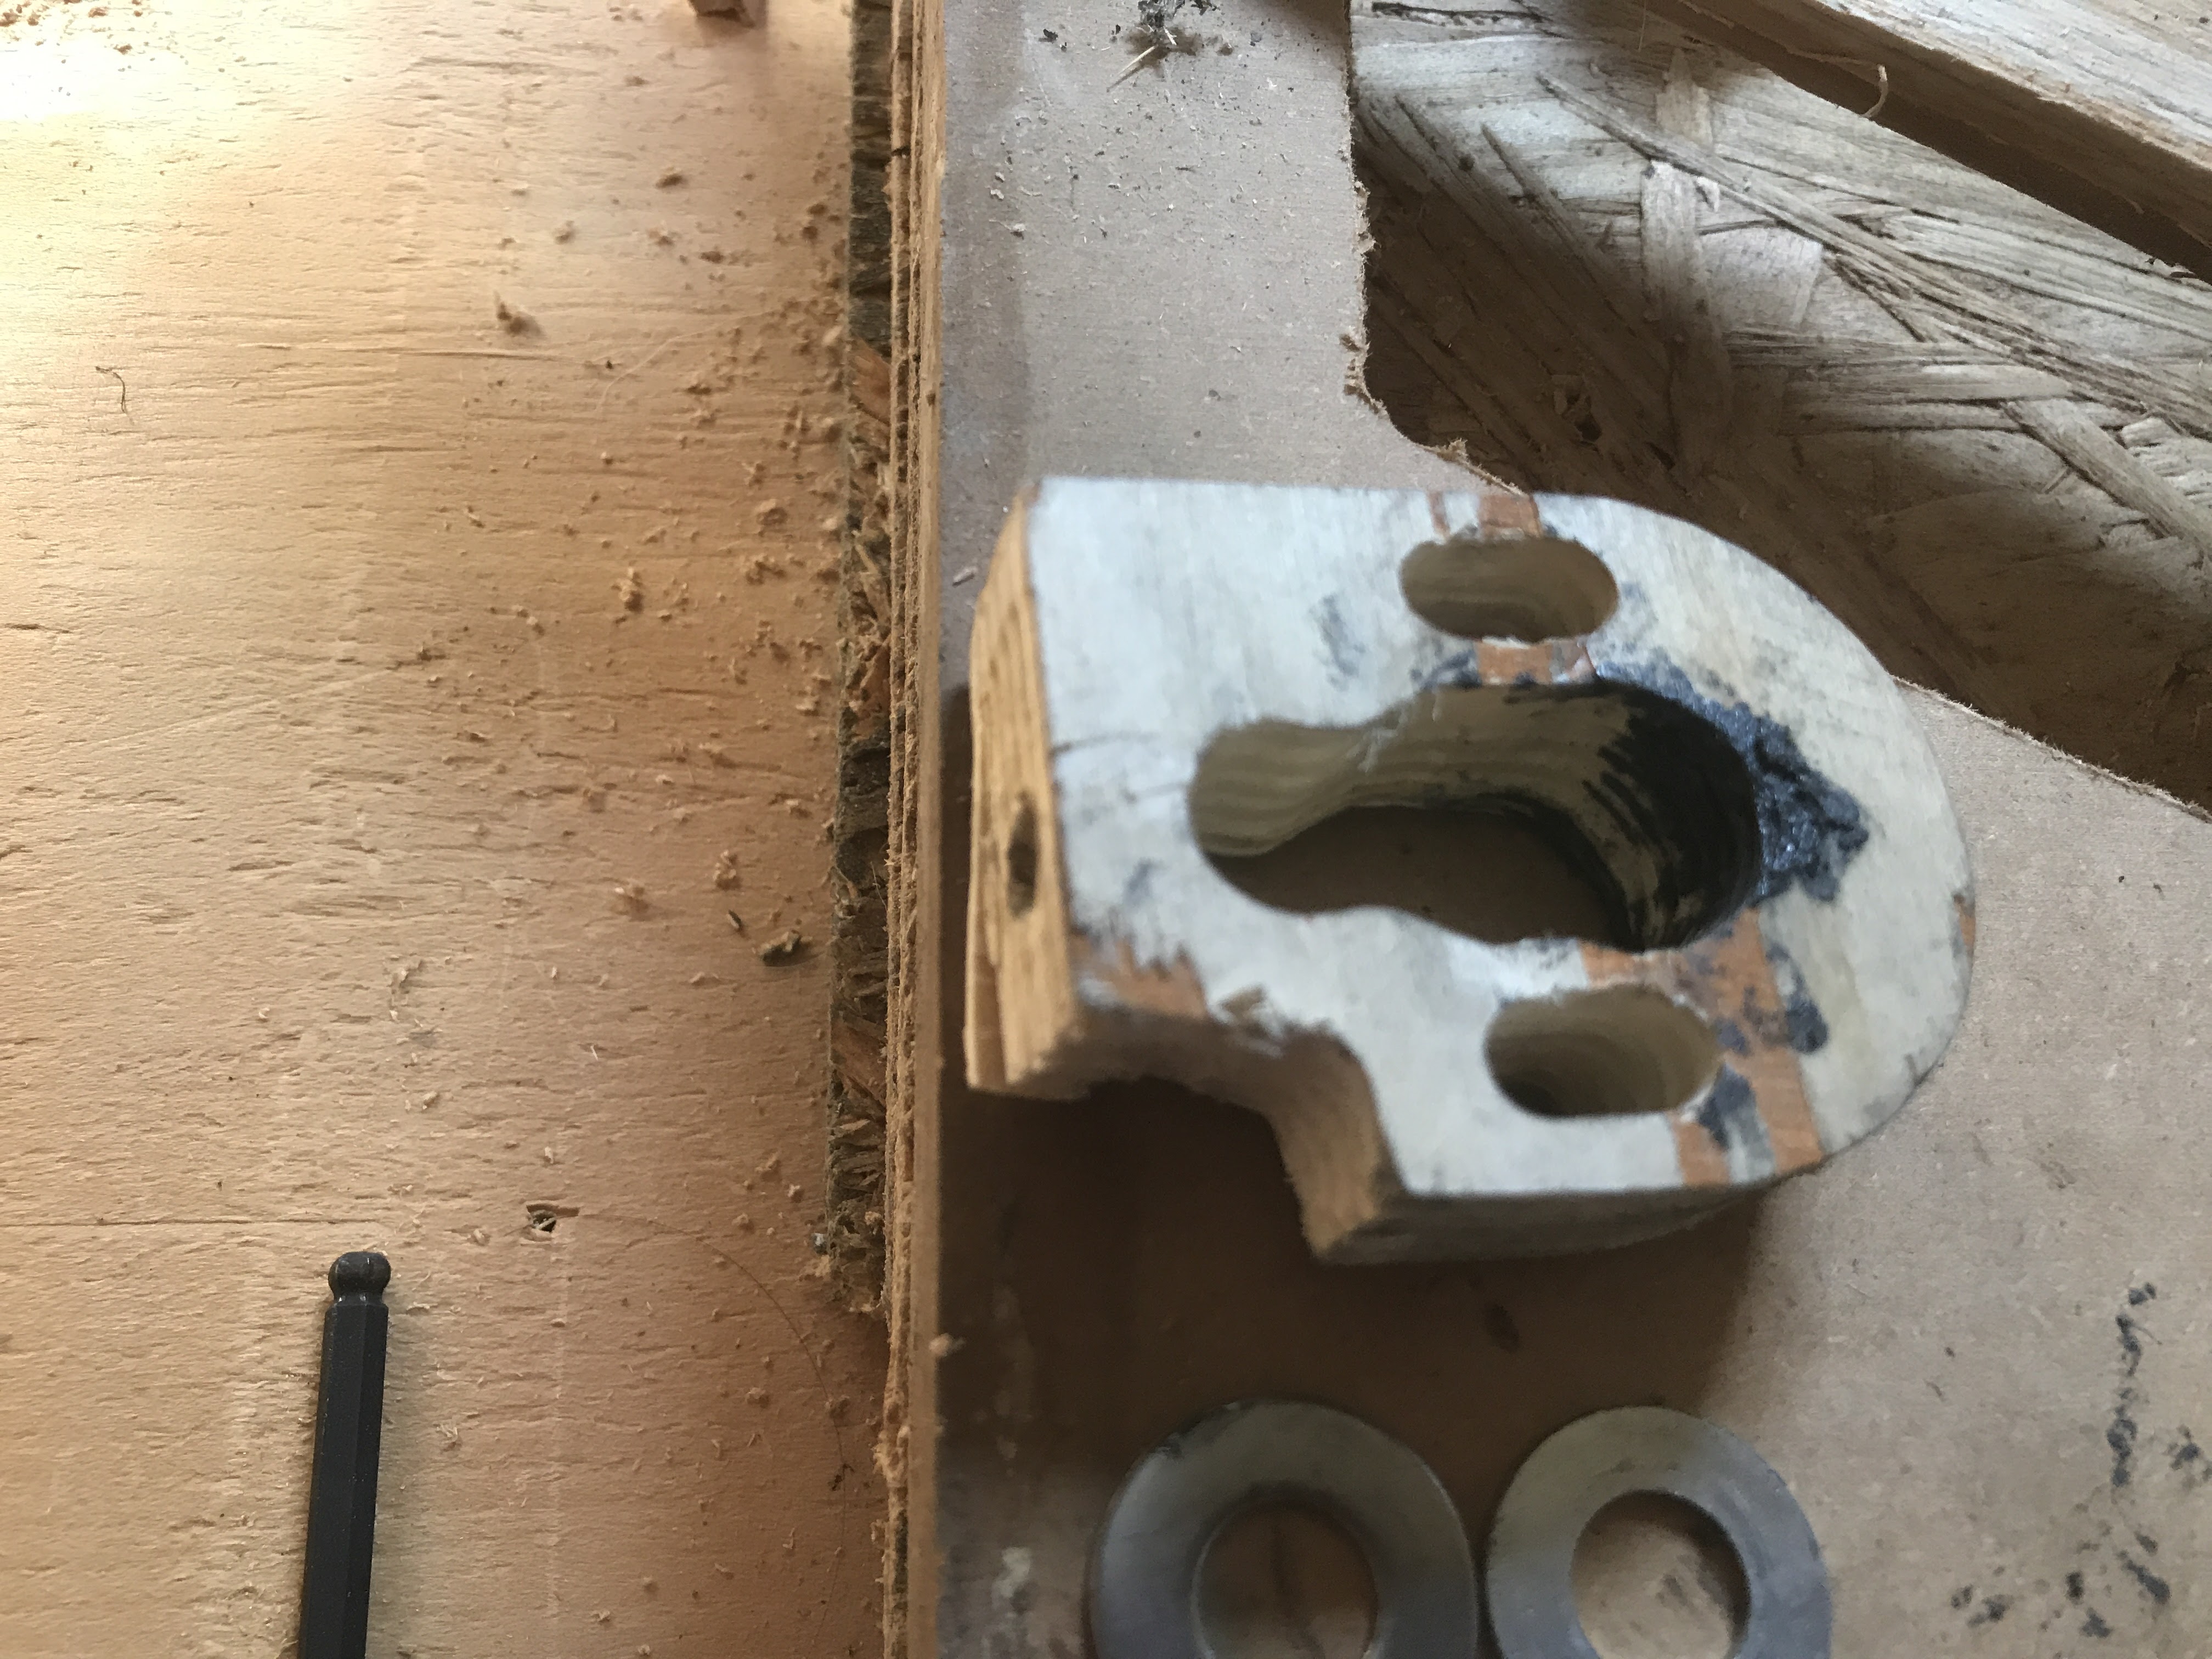
The area this part needs to be installed is a little restricted on space, so I needed something strong and small, and I went back to my old standby, Simpson Strong Ties. While I was at the hardware store, I picked up an A24 (which had the benefit of having a 1/2″ hole in it already) and an A33, which ended up being the one I chose to work with.
I needed to match the holes in the Y axis table, which I measured to be 3/4″ apart. I drilled all the holes one at a time, but I was pretty pleased with how this pair turned out.
I often have problems with holes being “a little off”, but I was pretty careful this time, and nailed it.
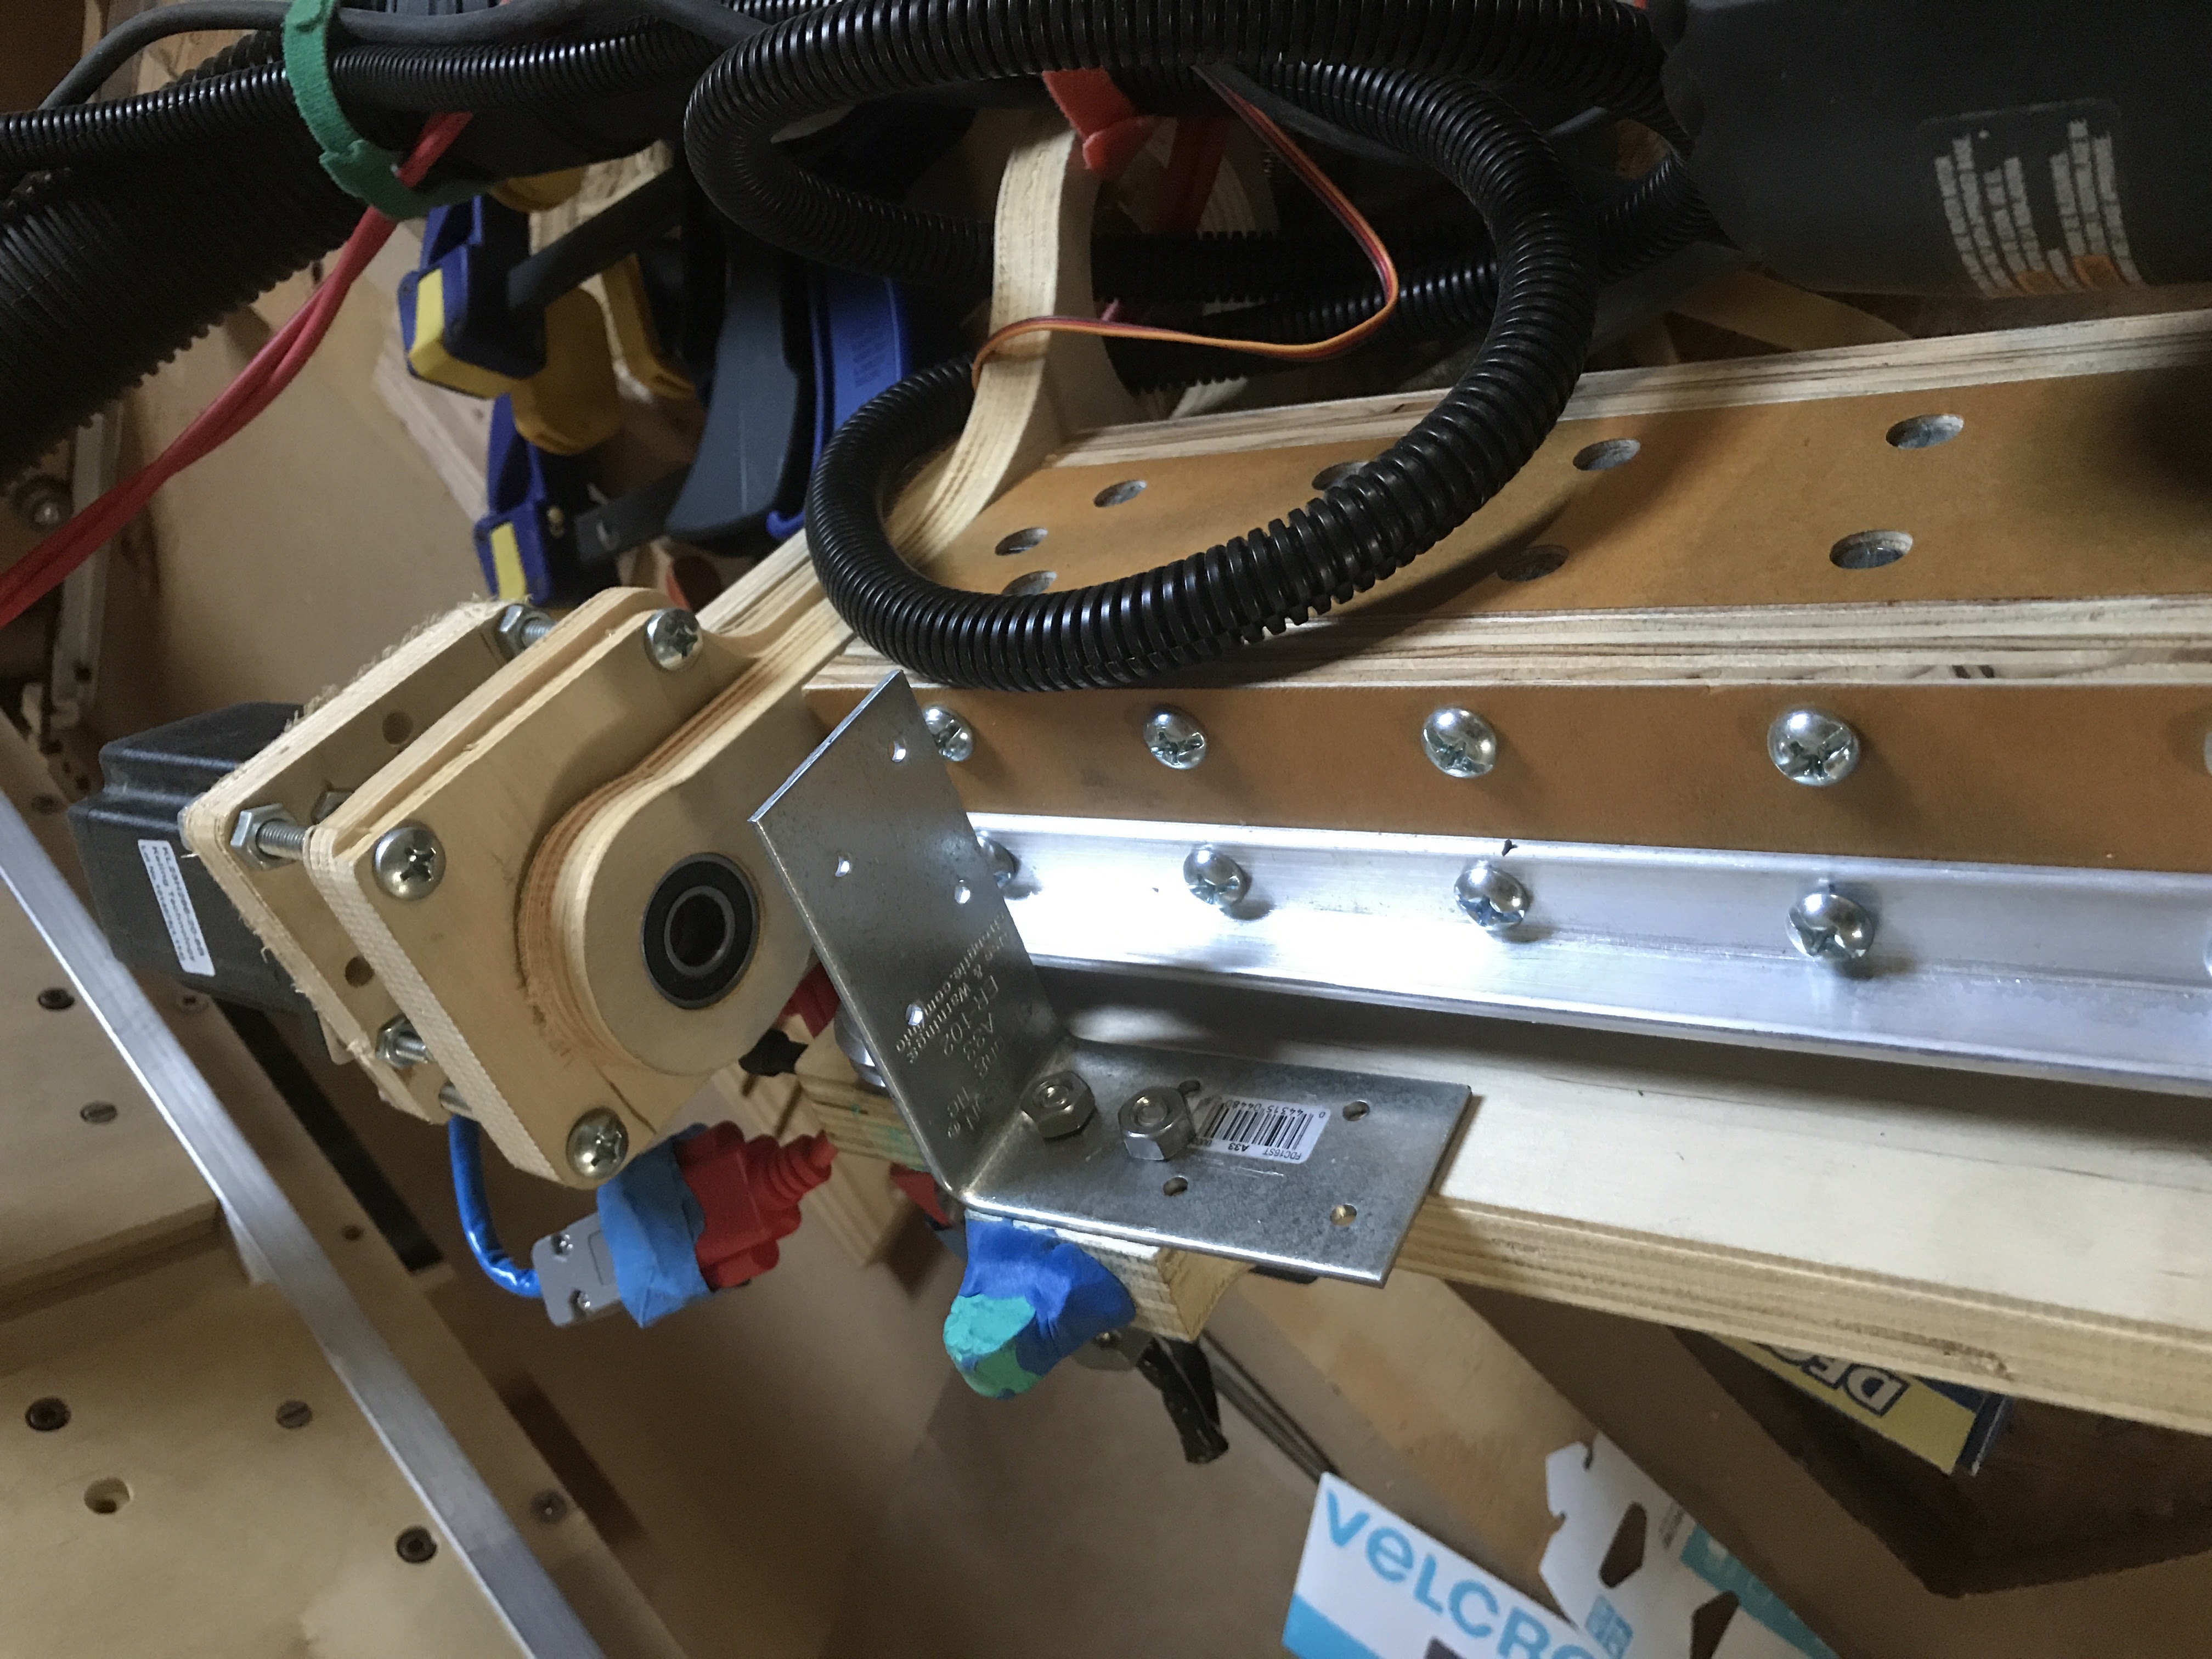
At this point, I needed to measure for the hole where the 1/2″ allthread rod would mount, and realized that I needed to make another trip to the hardware store, to pick up large drill bits. Sigh. I gave up for the night, and came back to it the next day.
After a quick trip to the hardware store (omg, big drill bits are spendy — I picked up a 1/2″, 5/8″, and 3/4″, … they were $25 *each* 😮 ), I chucked my shiny new 3/4″ bit into the drill press, and with a little more “measure twice”, I popped the hole right in.
As an aside, the drill press did *not* like cutting mild steel with the 3/4″ bit at 640RPM. I used tapping fluid, but unlike the 1/4″ drills I’d been making, the drill was really noisy and throwing off hot (!) swarf and smoking and heated the entire part (I kept touching it by mistake while I was deburring it, ouch). The hole went in, but yikes.
I did a test fit, and the allthread went right in! woot.
A couple more holes for bolts to hold down the nut itself (there’s a whole thing there, but suffice it to say that 1/4-20 with washers is the order of the day), and I was ready to finish the installation!
Getting the Y table reinstalled onto the Y rails was a bit of a chore, but with a little help from a friend (thanks, L!), it got done. Re-threading the roller chain required a quick check of the original plans, but it went in nice and easy.
I was suddenly ready to test the CNC machine again.
Booted up, ran Mach3, ran the Z axis back and forth a couple times, and realized that I needed to adjust the washers a bit on the holddown bolts (they were pulling metal flakes off the axis rod, oops 🙂 ). Other than that, things seemed to be working pretty well. I re-homed all 3 axes, made sure that the machine can still move in all three directions, and that the Z limits still work.
I didn’t do any cutting, but everything related to the recent repair seems fine, and the CNC is back online!
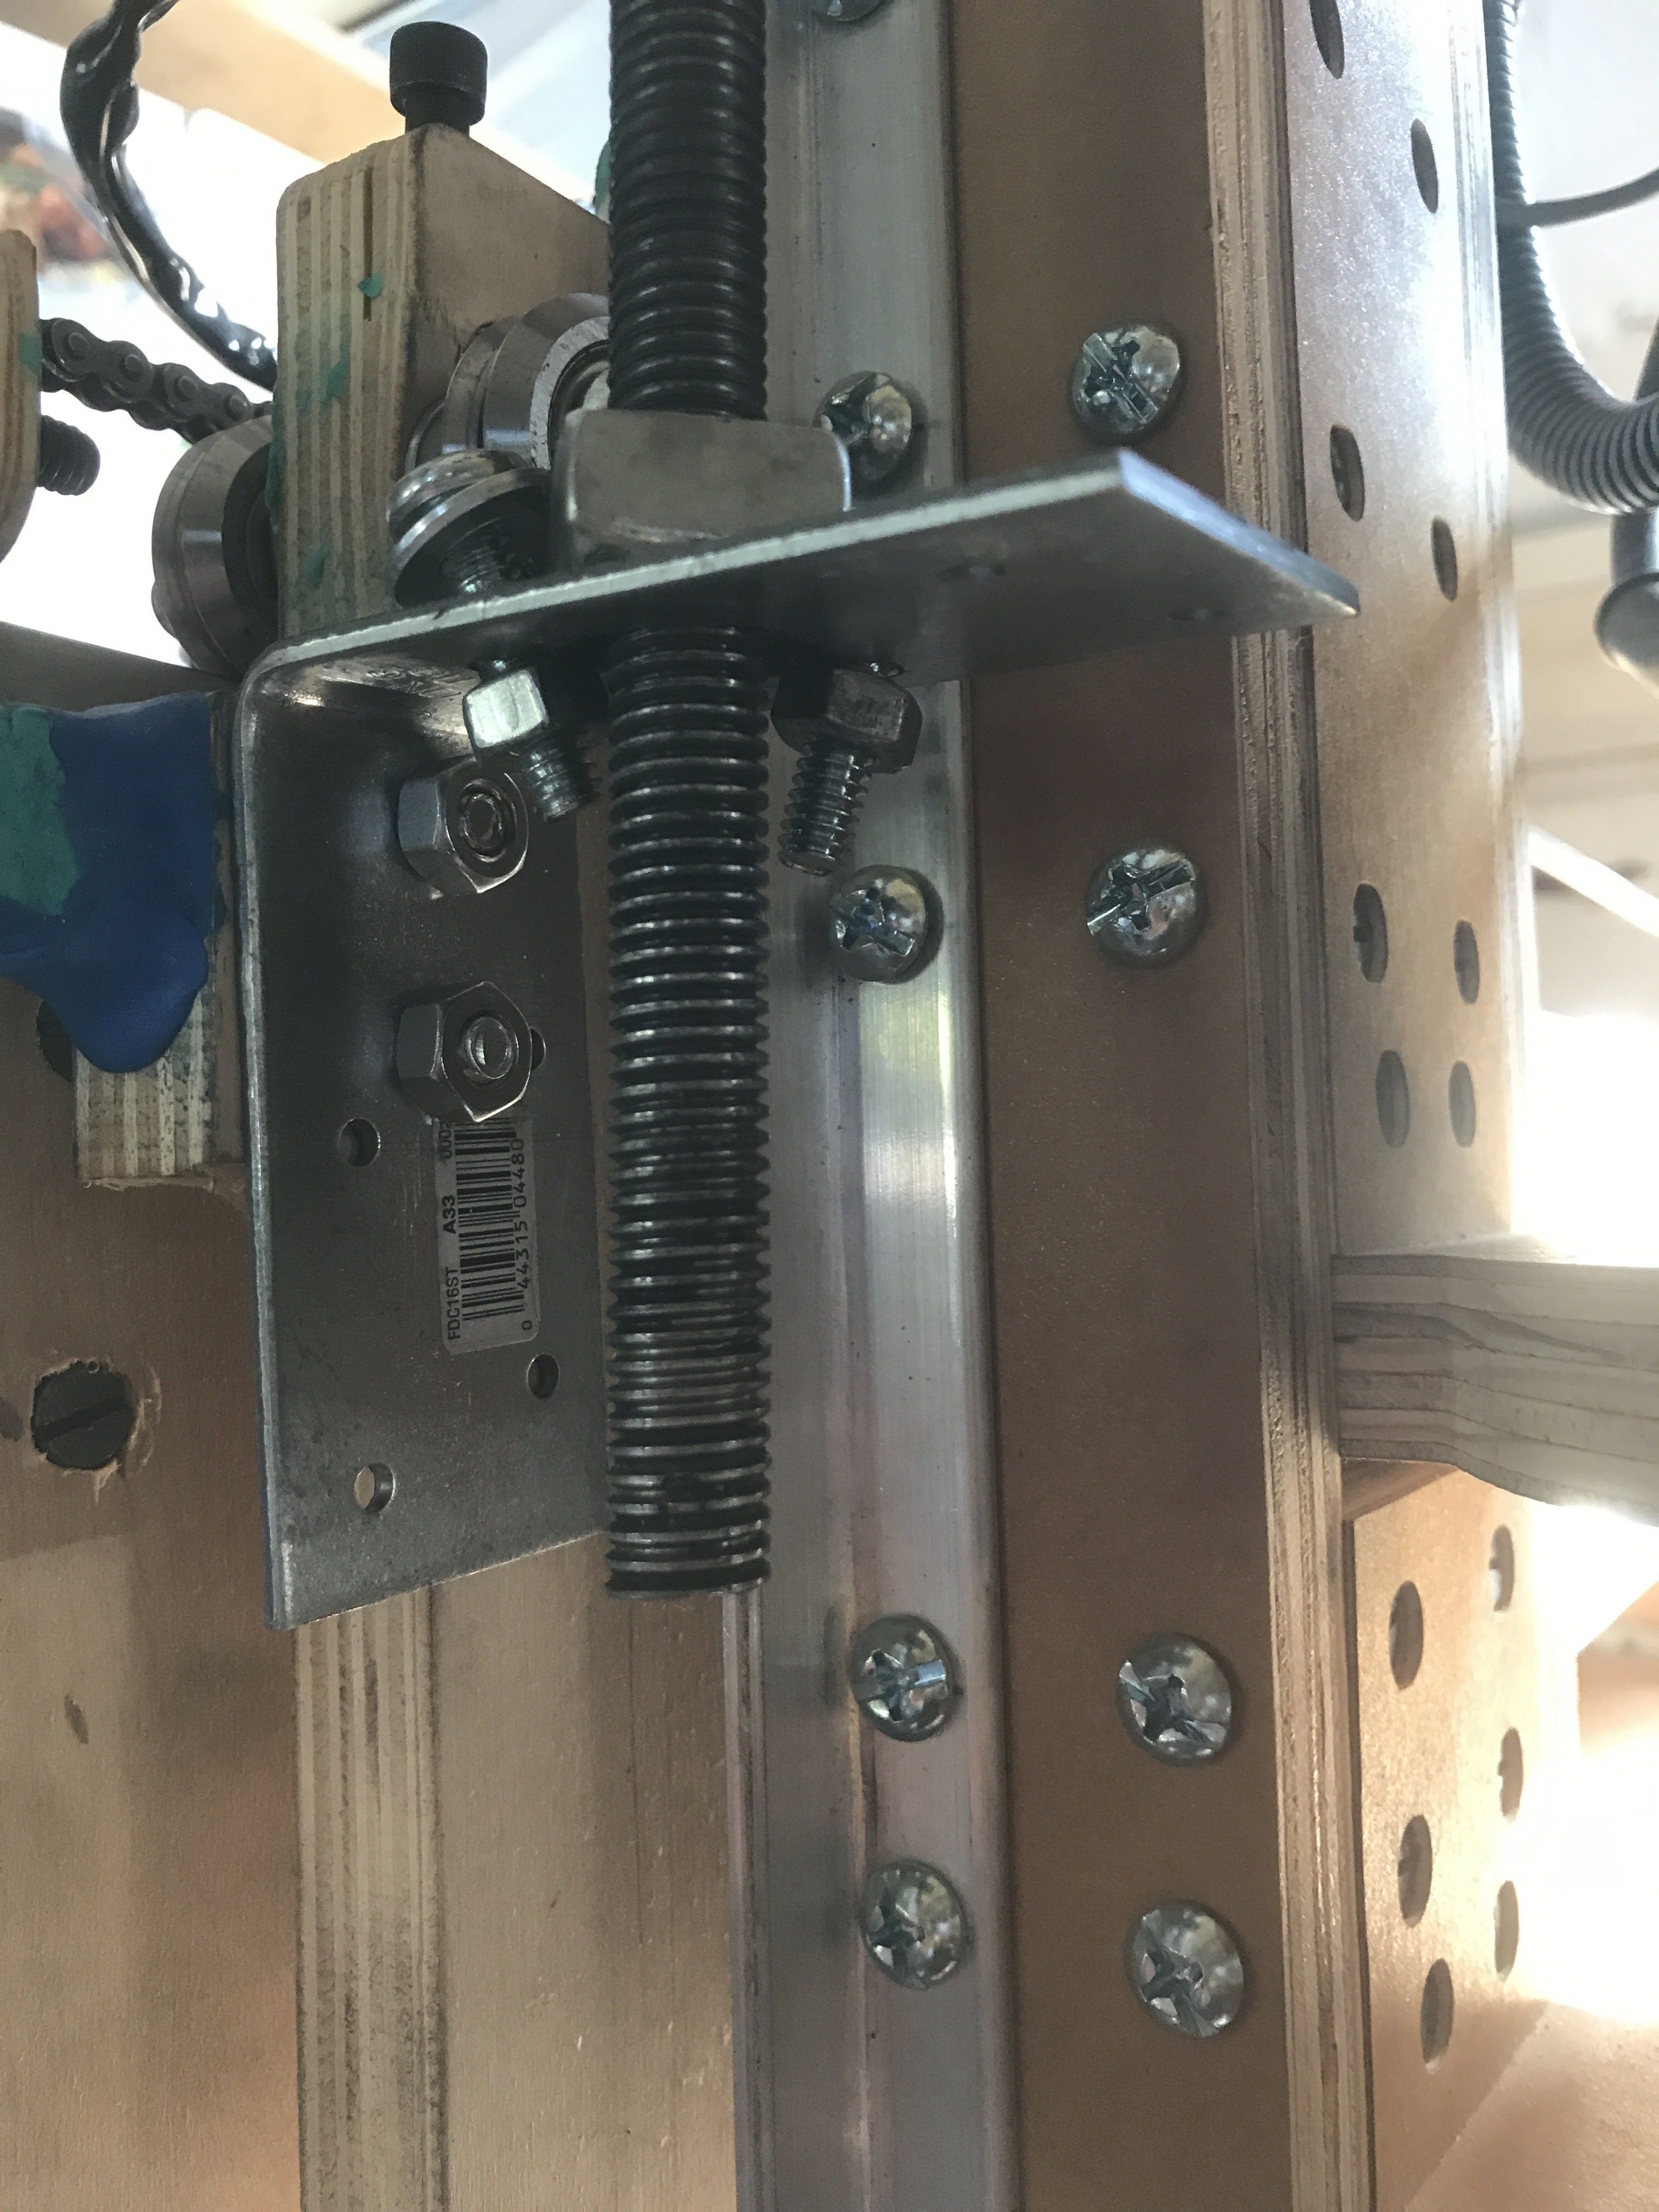
It remains to be seen how well this will work, but it looks and feels a lot more sturdy than it ever had before.
I need to put the machine through her paces again, but it’s very good to knock this one off the punch list.